
4. Branding Settings
This step is crucial as it will guide the creation of all your content, ensuring that the Artificial Intelligence creates more accurate posts.
4.1. Color Palette Setup
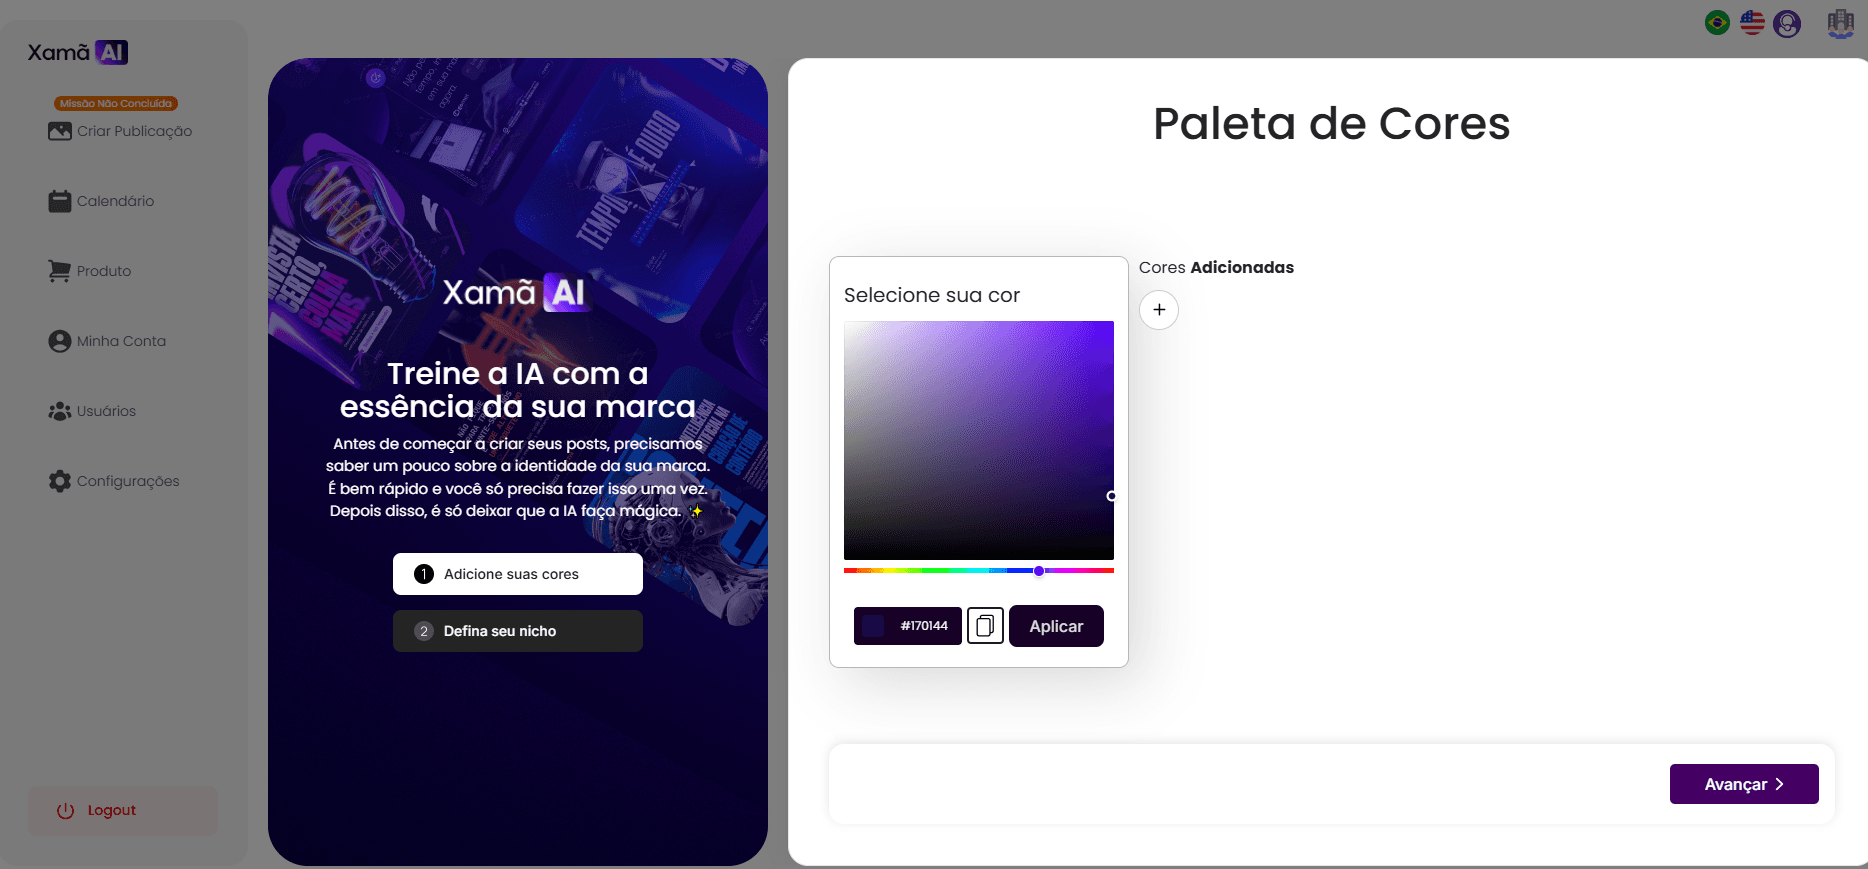
The first step of the branding settings is to define your brand's colors.
On the "Color Palette" screen, you will see a color selector. Move the cursor (item 1) to the desired color, or enter the corresponding hexadecimal code in the text box (item 2).
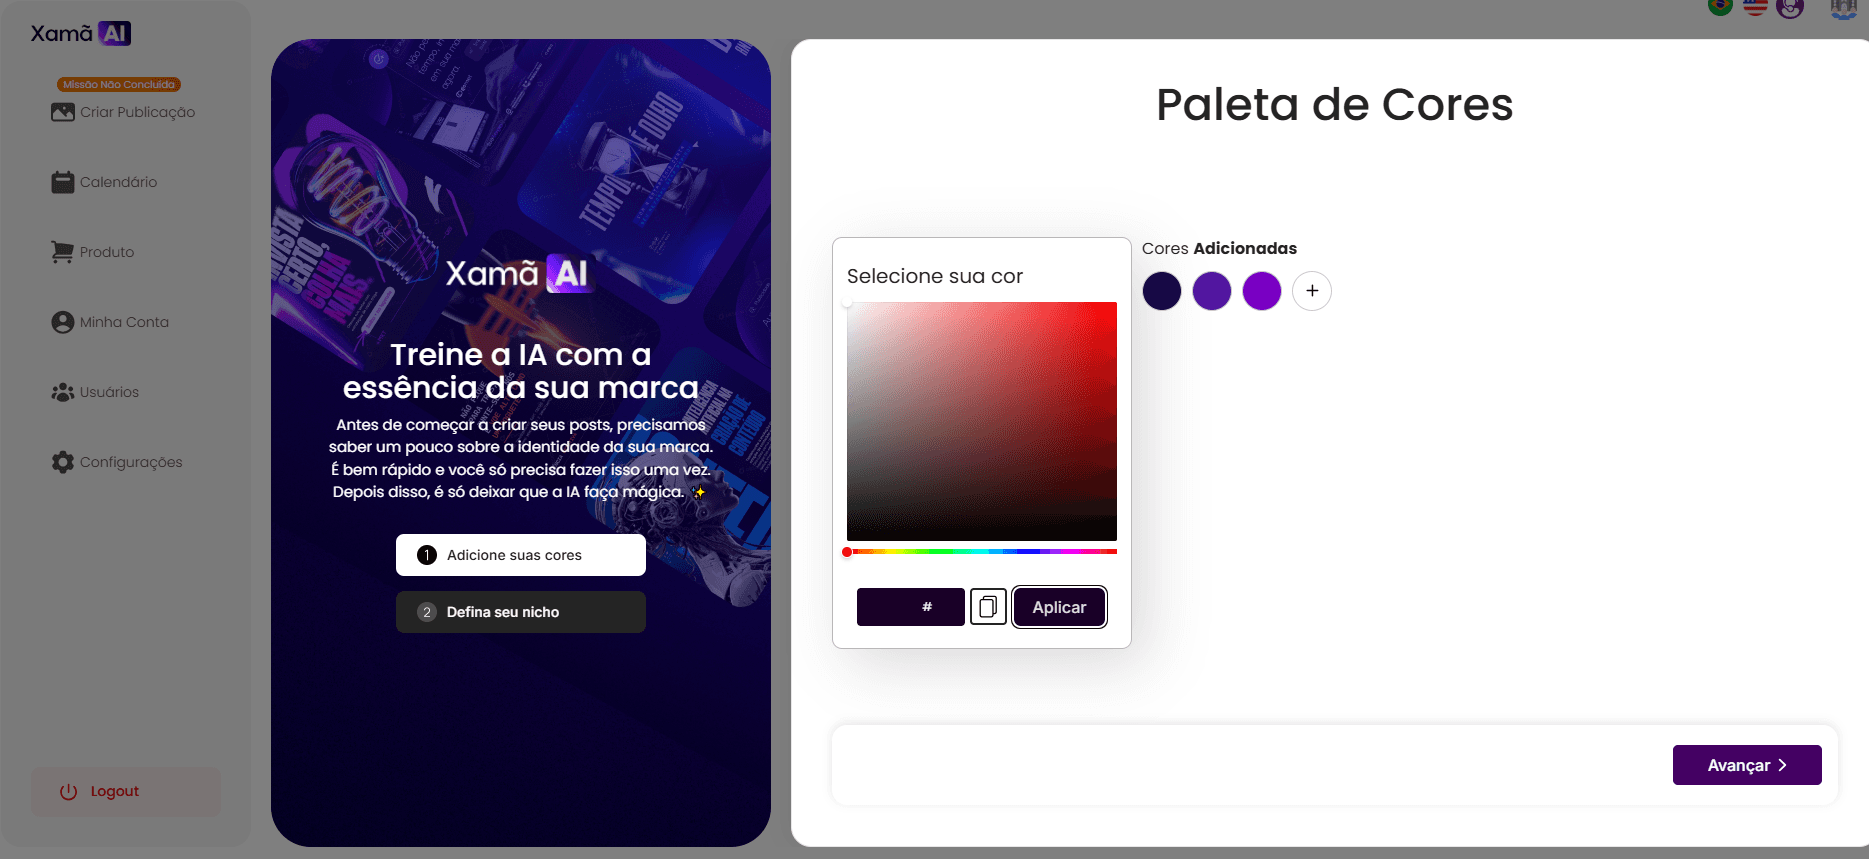
It is mandatory to fill at least three colors (primary, secondary, and tertiary) for the palette. You can fill up to 5 colors. The spaces for the colors are arranged in order of priority, from left to right, with the primary color being the most frequently displayed.
To save the progress and add the color, click the "Apply" button (item 3). When you click "Apply", the color sample will no longer be white, but rather the chosen color.
To add more colors, click the plus icon "+".

To proceed to the next step, click "Next".
4.2. Niche Definition and Business Description
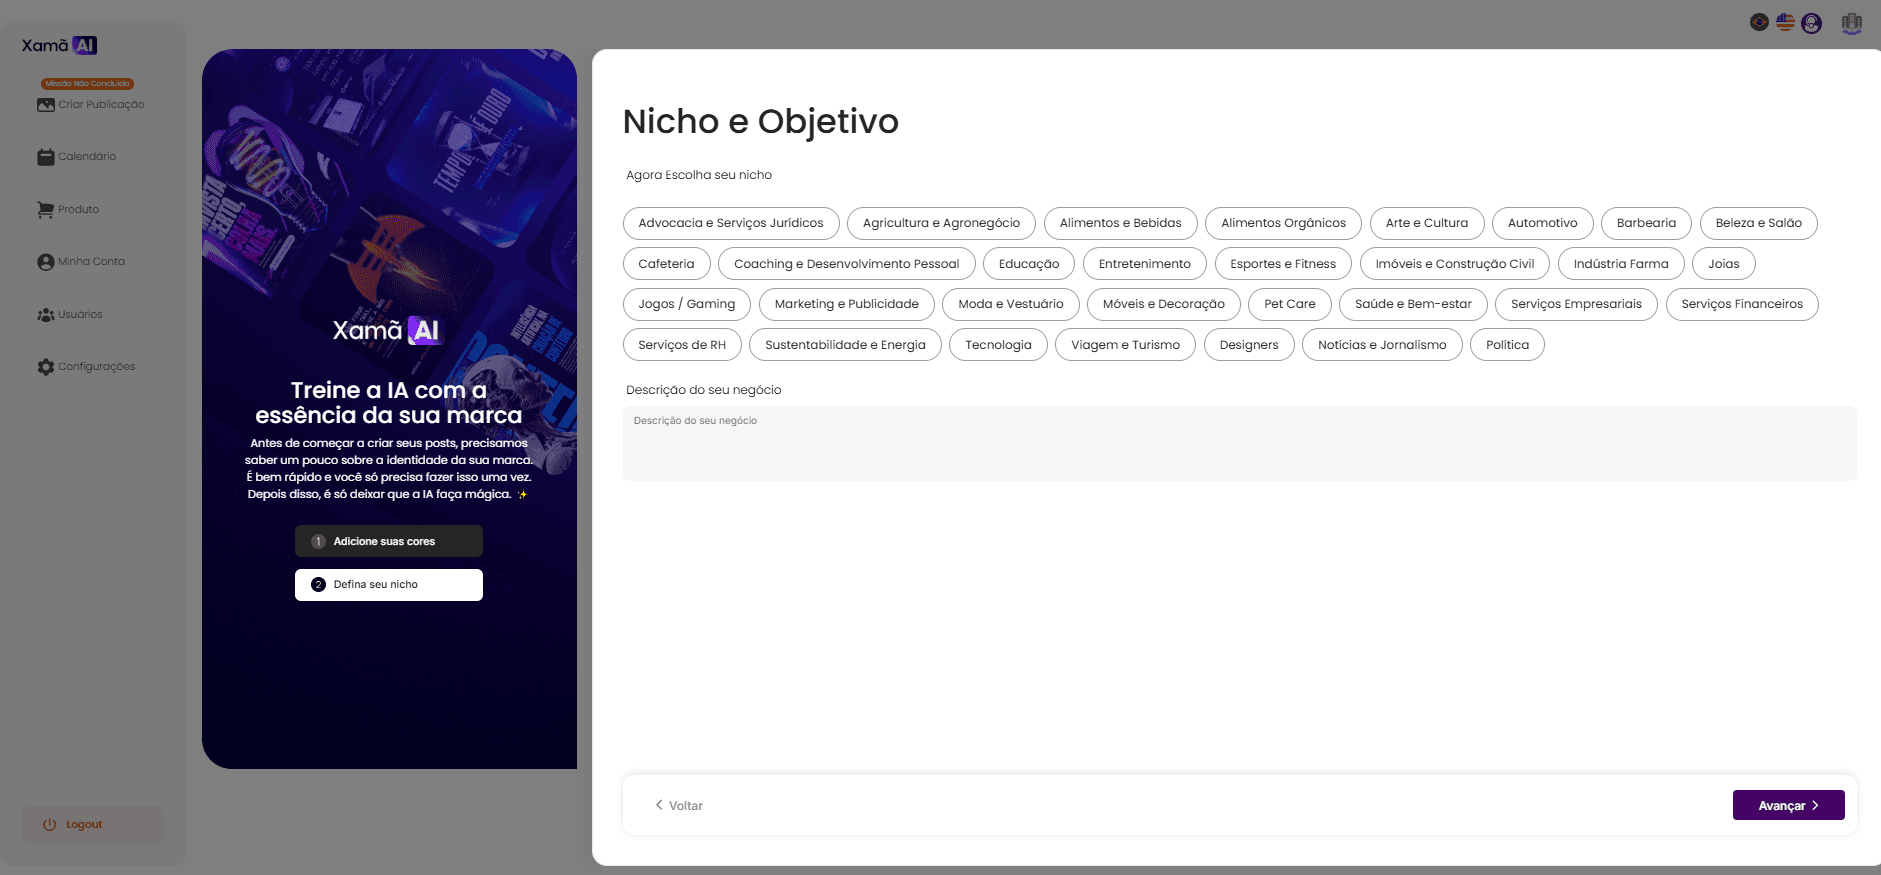
In Step 2 (Business Information), you will fill in some operational data for your company.
Firstly, select the niche of operation, that is, the market in which your company operates. If you do not find your niche exactly, select the closest one.
Next, fill in your business description. Here, you should describe the main features and differentiators of your brand, as well as provide more information about your operations.
To proceed to the next step, click "Next".